Monday 29 April 2013

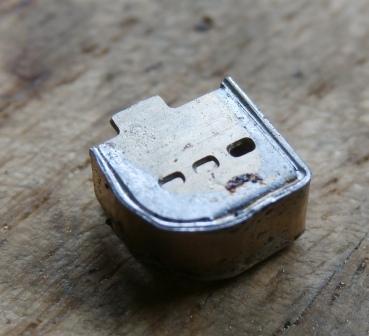
Lima HO scale wagons

Svanda
The second of the LIMA NSB vans done and perched on Svanda. This was really a 'I must get the desk cleared' moment. Getting it done this morning meant that it could be delivered to Crawley at lunchtime and I could wave it goodbye. There is just scenic titivating to do now before the layout hits the public at the Croydon show in October.

Friday 26 April 2013

Interesting times

Some light weathering to do, but basically finished.

It's all quite interesting at the moment: I've sold my house - which brings a whole other set of problems - I'm quite enjoying working for a change and there is a contract on the table to sign for a new project which may or may not lightly feature here. All in all, lots to think about.


Wednesday 24 April 2013

Light railway station.

 Once in a while I get an idea. I can't remember if this has been done before, but it seemed logical. Turning the Wills tin chapel kit into a small station building. Not too difficult: some careful hacking with a machete to get the door and window openings, the rest was just a case of moving a few things around to make the structure less holy and more like the station building at the Llanfair end of the W&L.

Tuesday 23 April 2013

LBSCR Stroudley coach

LBSCR Stroudley coach
 My original plan of using the Roxey seat mouldings back to back didn't work. Why? Because there wasn't enough material in the kit for the six seats needed...odd. So. For the middle 'low backed' variety some square stripwood and thin ply. The later from a wooden cross that the Jehovah Witness' dropped through the door. I'm pretty anti-any religion, however if any denomination wishes to give modelling materials away then I'm all ears.
LBSCR Stroudley coach
 A set of single seats at either end and a par of 'lows' in the middle and we're done.
LBSCR Stroudley coach
Ta dah! This has been the longest build in my entire modelling career. The kit was bought in 2000 and the chassis built not long after. Then it languished for a while. Thirteen years on (and I note a price jump from £46 - £70) and it's complete. Would I recommend? Well apart from the small niggles outlined along the way, yes. Even at seventy quid you get your modelling money's worth and that to an extent is the mind set of O gauge. It can be pricey, but the cash to hours ratio is higher than the smaller scales simply because there is more to do.
Now it needs somewhere to run. Tim.....?

Saturday 20 April 2013

Glazing over.

LBSCR Stroudley coach
Glazing done. I'm quite please with the way the open droplight turned out. There's been a lot of handling which means I need to straighten out a few of the grab handles.
Just the seating to go now.

Thursday 18 April 2013

When I'm Cleaning Windows

 So how come these are the right way up? Technology, don't you just love it?

I get guilty. What I should be doing is finishing the Stroudley coach which is now on the home straight. So onto glazing. The kit comes with some 2mm-ish bendy perspex coated with peel-off stuff on both sides. Measuring the inside of a box with a foot long ruler is not easy, but with a little guessing I got one bit shaped to fit with a tongue to slot into the bulkhead gap (below).
 Having peeled my plastic it was secured with a dollop of UHU in each corner and backed up with some pound-shop masking tape. I use miles of this to stick music together and know that it will peel off in a few minutes, but after that welds itself to a surface for all time. Some brown paint will cover it up later.
 Main sections done.

Monday 15 April 2013

P.D.Hancock Scenics (plus)

Yes, I know don't tell me. I've tried several different versions and Google insists on flipping the photos. *sigh*
Continuing the occassional series on modelling books of the past.

The above was mentioned in one of the comments a couple of weeks back, and by coincidence a copy was pressed into my hand the same week.There's no publication date, but the price and the hand of CJF in the production would point to the mid-sixties and I assume was within the brief of the 'Shows you how' pamphlets produced by PECO.
It's a bit on the light side and PDH seems more interested in the fact that you should find your own way of doing things. Plus points are the inclusion of his 2mm Gleish Valley Railway on a 3x2' board and the classic Hancock artwork and cartoons.

PS: I'm grateful to CP for expanding the research further and emailing me with the suggested publication date of 1953/4 (working from RM adverts) and extra to that, that it would seem that there were two editions, this being the first. The second, as I guessed, added 'Shows you How' to the lower title. So was this the first of that long running series of pamphlets?

Sunday 14 April 2013

Dutch 2

Dutch Sprinter unit

In order to avoid being handed English menus, an experiment was carried out: short jacket and scarf for Mrs F. and pointy beard for self. Worked perfectly. We were adressed as locals from then on.


Quite a few night photographs were taken. Some better than others. Trams at speed.

Few cars, but trams and bikes - the utopia we shoule all aspire to?


Friday 12 April 2013

Going Dutch Pt 1

The 9.15 from a field in North Kent

A tram amongst the dog shit in Brussels

Belgian unit.
The rather glorious station at Amsterdam. The right clock tells the time, the left the wind direction.


Saturday 6 April 2013

Hawk Pt 27

 If I stand back now, I realise that there is still a lot to do and most of it is fiddly. Working on the theory that it was easier do do it earlier than the instructions suggested, I soldered the nut onto the L shaped bracket. This is comparatively huge and will (if I get that far) retain the piece of PCB that contains the pick-up wires.
 The cylinders need folding into U, and then wrapped round the outside. The paperwork says to do the latter after they've been soldered onto the frames. This may give more to hang onto, but I thought it wise to get the wrapping done away from the main bit.The wrapper was roughly pre-bent and the jiggled into shape with  a pair of pointy pliers....
... and fixed using the tab and slot. One done.

And now, some music....

Friday 5 April 2013

Stroudley coach underframe.

LBSCR Stroudley coach
A change of tack for a bit and a little painting of the Stroudley coach. The underframe is basically complete now less couplers. There seems to be a lot of livery disagreement, but as usual I'm looking at the photo which even though it's B/W gives quite a few clues. GW 'scorched earth' for the frame and black for the W iron assembly, plus a few greys and metallic for details.

Thursday 4 April 2013

Lewes signal box

I took this last Autumn while hanging around waiting for a train home. Probably a fairly hefty building for what it actually does now. For those unfamiliar with the area, Lewes used to be a four-way junction: Brighton,Victoria, Eastbourne (which spits to Seaford a mile down the line) and Uckfield. The later line was lifted in 1969 in a rather contentious road improvement scheme and has been threatening to re-appear ever since. The box stands at the Eastborne end of the triangle and is slightly quirky due to the crude and drunken 'extension on the back (in 4mm a section of Wills shed and a piece of Airfix footbridge would get you going in the right direction). Also note the half-buried cabling which is always absent from modern-image layouts

Wednesday 3 April 2013

Hawk Pt 5

I don't often recomend things outside of the blogs main subject, but this was delightful. a very human portait of a very talented man. Go watch.........
 
 
So far it's been fairly straight forward. I've built chassis in 4mm before, but these have been chuck the frames together, sort motor, fit wheels , off we go. This is different. This time we are into injun country (whistle theme from spaghetti western...). This time there are cylinders, and wavy outside cranks to play with. In other words, this is where I'm going to mess up.
First I had to play the 'file the bearings' game again to get them down to the thickness of the cranks and solder them in flat. The smart money said do this on the fret. (above)
 Then it got really silly. "File a flat on the 14BA screws" and "shorten the nuts". Can you see how small these are??? I had trouble picking them up. Again clamping in a vice won't really work so more filing away at the end of the fingertips was the way to go.
 Fingers shortened suitably, the bolts were soldered into the holes. The tricky bit here is keeping them square to the crank and I won't know if this is accurate enough until later on.
Finally I ground the heads of the bolts flush with the bearings. This whole operation is made more difficult as it feels backward - a bit like driving on the left - the theory is OK, but the brain is saying that it's wrong, i.e. the bearings feel as though they're back to front. I'll carry on with care.

Tuesday 2 April 2013

Springtime

 Motor screwed on, so time to check that it all fits on the axle. With it lashed-up to the chassis I took the opportunity to put a tiny drop of oil on the motor bearings and give it a run for half an hour to bed it in a little. It cogs a bit with a feedback controller.
Being as it was the 1st of April and the clocks bounced forward over the weekend .... time to fit the springs. I just tinned the part and touched it into the existing solder around the bearing. Note that I've given in and started reading the instructions again.

Monday 1 April 2013

Hawk Pt 3

 As usual I'm just using the instructions as a guide so instead of starting to add the pretty bits I moved over to running gear. I don't care how good it looks, if it won't move under it's own power then it's useless.
The kit comes with a small Mashima motor and a Branchlines SL mount. However the big bearings are again present, and I can't stress enough how little room there is to play with between the frames, so once again they had to be reduced. This time though I soldered them in first and saved my fingertips by having the mount to hang onto. The mount was drilled to take the motor screws, then folded and the LRM axle used to square up. It looks narrow here, but it's a smidge over 6mm wide and the back to back for 009/09 is about 7.5mm so when those figures are put together you soon see how tight it all is. Finally solder was run down the folds to firm-up.