Although I've been doing other things this week, I can't remember it ever taking this long to lay and wire a simple crossover before. Laying your own allows a little wiggle room, whereas here you are on fixed sleeper spacings so a bit of a learning curve. Laying the OO stuff is easier in that the usual trimming of the plan track sleeper ends to splice into the point doesn't really notice too much. Doing it with O has the potential to look shite, so much juggling to minimise this and I'm still not 100% happy with it.
I did complicate it marginally by opening up the 'six foot' on the loop by adding an inch or so between the points making it a more fiddly than needed, and then this created a similar stupid tiny length to be added bottom left. I can't imagine that the mix of a right and a Y closing the loop at the other end is going to do me any favours either. theoretically this is all a doddle, maybe I just make life hard for myself.
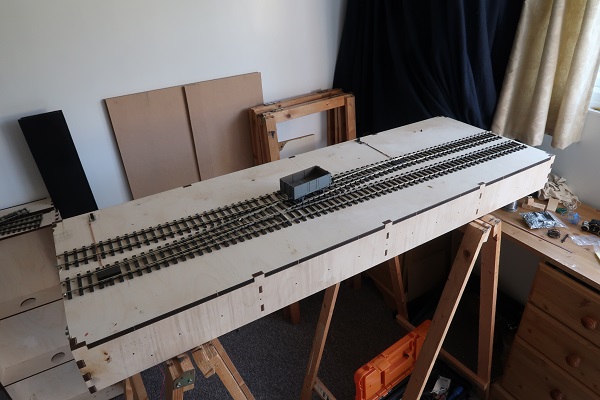
Deep ballast and weeds cover a multitude of sins. Know what you mean about fixed geometry though. You can't always do what you'd like to. Doesn't 0 take a lot of space! Worth it though...
ReplyDeleteI've been tracklaying in 009 for the past week and a bit...first real go at using the "Main Line" stuff. There's been a lot of cutting and shutting of odd bits of sleeper base as well as careful surgery to allow rail joiners to sit on sleepers at joints.
ReplyDeleteOne thing I've noticed is that the 18" radius 009 points are far better engineered than the older 12" examples I already had. I've also made use of a brand new Y point and it's as good as the main line ones. Progress....
I think I have used the odd bit of Peco 0 track but it was a long time ago.
If this lasts long enough I may start building some EM points though as I have parts for PCB, plastic and ply and rivet I don't know which construction method I'll go for.