Friday 29 December 2017

Dinky Toys

I don't normally do this sort of thing, but this caught my eye yesterday. Firmly aimed at 'gentlemen of a certain age' a partwork of repro Dinky cars from the 1950s onward. You get a car with box and a slim volume of info about the model and the prototype. The scale is stated as 1:43, though this should be taken with a pinch of salt. It looks closer to 1:50 to me.

This first is priced at £2.99, the second is £7.99, the third and onward £11.99. Or that is what it appears. What I can't find out is how many there are all together so I can't calculate a final figure. Even at eleven quid it doesn't seem too bad (how much are diecasts now?).
Probably one of the better of this sort of thing, but as it's not the original, the forward value is questionable.

Thursday 21 December 2017

Southwold Railway

I hadn't seen this before. Obviously part staged, and if the traffic levels were this good, it wouldn't have closed. 


Monday 18 December 2017

Track plans

A general sort through the 'bits of track' box turned up four PECO medium radius and a single slip in code 100. I noodled around for a while and turned this up -  a 3'6" - 4' micro shunting layout. This would almost clear the cupboard once I've worked out how to wire the slip. It didn't get a nod of approval from West Sussex - 'you won't be happy as it's code 100', but maybe clearing already bought things is good? Entry/exit could be form virtually any line as all end up on the loop, and it could be fed from a 'stick' fiddle yard or something more complex. A neutral industrial background would mean almost anything goes as far as stock is concerned. New Year quicky?

Monday 11 December 2017

Beach

A query below had me trying to stand upright in a gale taking a photo of a wall. The query was about flint when I'd said pebbles. The above is not the same wall, which was unavailable, but one nearby. One assumes that this is a case of using local materials, in this case beach pebbles. There's not loads around the area, but there's enough in a few of the older back streets to make it a small local feature.

Sunday 10 December 2017

Airfix wagon

Airfix OO scale wagon
The AotC needed some 'period' models to run on it. Period being early 1980s in model terms. Here's one I did earlier in true Blue Peter fashion. It's an Aifix ( I think) body, probably out of a rummage box, mated with a Ratio chassis. The weathering is light. There is a trend to make things look decrepit these days. This is probably a bit of overkill in most cases as anything looking that rough would be taken off and repaired. This is just a bit grimy, though looking at this I note that the insides are a bit too clean.
The track is the obvious Peco code 100. This would have been almost the only choice at the time if you didn't want to built your own. The wire-in-tube control is just visible.

Saturday 9 December 2017

Saturday Ramble

A couple of linked points drew together this week. The first was probably the recollection of something I've read recently online (Paul Marshall-Potter) about the distinction of players and builders. For a split second I was confused by the word 'players', but the break is this: There are those who like to build stuff and those who like to operate. I think I fall into the builder bracket. Michael Campbell (blog to your right) has jibed 'it's unusual to see you behind your layout at a show'. He's not wrong - I'm happy to chat and build, but less keen to operate the thing. This means I'm not a player. The exhibition is a reason to build, but is not the end game. That falls to  the process itself.
The second point is the bounce from my rather tongue-in-cheek comment about jumping on the AotC. which has generated an amount of reaction here and via email. I wasn't literally going to jump on it, but the challenge was to build it as close as possible to the 1978 plan and in the spirit of late 70s early 80s modelling. That is now done - end of challenge, bell rings, all change chairs. In a nutshell: now it's built, I'm bored and want to make something else. See there, it's happened again, builder, not player. I'm not alone here; there are some who regard their layout as the final act, but probably more who enjoy the process of making something just as worthwhile. I'd probably be better off building layouts for other people to take to shows, than layouts for me.
Right, all that said, I'm off to make a noise with Chesney Hawkes.

Thursday 7 December 2017

Warehouse Wednesday

Yeah, I know, late again. I caught this a couple of days ago on my walk to the theatre. It's the back yard of a large hardware shop. This has closed and moved, and the whole lot is being demolished. So quick as a flash I'm in there with my phone. Another day or two and it'll be gone. Note the pebble walling.

The Art of the Compromise

A request below asks for the whole thing. Tricky in a midnight room light situation, but here it is.
The Art of the Compromise - less art more compromise. It may well go to the WRG show then get jumped on as my challenge is complete.

The original post here:http://unnycoombelala.blogspot.co.uk/2010/12/compromises.html

Wednesday 6 December 2017

GWR signal

On the original AotC plan in the Modeller, there was a bit more open space to the right of the platform. This aped the set up at Fairford with the ganger's hut and a the starter. The reality is that there isn't enough space at all if you want a long enough platform, so it has to be tweaked. This throws up a problem in that the ganger's hut can go, but the starter can't.

I'd rammed the platform right up to the bridge. This is not an issue, but the prototype would have dropped the post through the platform surface. I could have done that, which would have meant destroying the signal ladder etc. I've gone for a bodge and rigged up an angled 'foot' out of scrap and brick sheet. It looks a little bit trainset now and is impossible to bed in with weeds in this position.

The second issue is do I make it work or not? It's possible, and there is a handy cross member to attach a crank to, but....

I think the biggest problem is that now I've done the deed and built the Roy Link plan, I want to move on to something a little more logical without the compromises.


Tuesday 5 December 2017

14XX fire iron hooks

This is in some ways a quite old school bit of work - most of my stuff is. A lot of the newer components are wonderful, but I tend to fall back on old ways as they are safe, and more to the point, fairly cheap. They also require 'modelling' as opposed to just buying a bit. This is a case in point. There are I believe some very good etched parts for fire iron hooks, but I have a box of staples in the drawer and a little work with some fine pliers gets a passable shape. Four holes and some super glue and you're away. They're painted now and are barely noticeable. This is good - subtle shapes and shadows work well.
I got taken to task earlier on the phone about my glib mixed class reference. The problem is that before 1946 (i.e. most of their lives under GWR colours) these were 48xx and so most of the modellers usage should be under this numbering, but they were so much longer under 14XX that it seems a bit awkward referring to them as anything else.

Monday 4 December 2017

GWR cabside number plates

Number plates for the 14XX have arrived from Narrow Planet. Very tasty and a bespoke service all for just a couple of quid.

Sunday 3 December 2017

OO gauge uncoupler


I tend to use a hand uncoupler for most things - yes 'hand of god' but a quick flick is preferable to yo-yo-ing back and forth over a magnet. Most of the layouts use a loop over a pin set up: Svanda uses single ended Euro-Bemo types and the 009s use Greenwich. For these a bent paper clip woks fine. For the AotC I've stuck with the smaller narrow Airfix/Bachmann tension locks. Here the paperclip doesn't work as well as you have to find the 1mm gap to lift the hook. Therefore a trial is being undertaken using a paddle uncoupler. Pence to make: old paintbrush handle, paperclip and three scraps of plastic sheet. The handle is drilled and the clip stuck in. The sheet has a small groove filed in and clip stuck in with UHU. This is followed up with thin sheet to trap it with more UHU and finally solvent. The paddle slides under the wagon and lifts the dropper not the hook. I may have to go down the magnet route later, but this is a cheap first attempt.

Sunday 26 November 2017

Tiger Moth

I can't say that it's too often that I wander onto a job and find a Tiger Moth parked next to me.

I'm coming to the end of the year in terms of modelling hence the rapid tidy the bench mentality of this week. Planning however continues in the dark recesses of my brain. The book three work is primary and ongoing, but there are as always a few side projects. The first is to get the AotC finished for the WRG show in the spring. The thing is that once you have tripped over that line in your head that it is now exhibitable (which wasn't the idea) I found myself hustling for the Swindon show last weekend. Secondly, the same must apply to the 009 layout Orne, which is in a similar state of 'nearly there'. This though is slightly less urgent, it's first show not being until March 2020.

Tiger Moth

Saturday 25 November 2017

009 Society wagon

Last post of the week - I was determined to do one a day for the hell of it. Yesterday I knocked up an 009 wagon for a photo build piece in 009 News. It's a Society kit made by Colin Ashby, and with one small niggle it is an absolute gem. It fell together and has about four brake gear options including the full vacuum version which is what I plumped for. It even includes the vac cylinder and operating arm, something I'd not seen on an 009 kit before. The niggle was the pipes which are a bit crude compared to the rest of the kit. Considering that I've been the magazine editor for over a year now I should do a bit more of this sort of thing.

Friday 24 November 2017

Wisbech and Upwell Railway

I tripped over this today. Fyffe Robertson was a voice from my early childhood when he was the Michael Palin/Nick Knowles of his day taking the viewer to all sorts of interesting places with an accent that sounded thoroughly exotic in those RP days of broadcasting

https://www.youtube.com/watch?v=_0Z938wfFgY

Thursday 23 November 2017

Somerset and Dorset Railway?

I cleared all the stuff off a shelf and found this. It's an original print, but unlike most of the postcard peddlers fare there is nothing on the back. I'm thinking early S&D with the 0-4-4, but can't be sure. Any clues?
The disc signal is prominent, but there is a standard semaphore in the background and it is unusually set away from the line so might be a bit of a red herring. New line, or freshly singled?


Update: I'm now reliably informed that it is Spetisbury on the SDJR c. 1900 during widening/doubling work. More below.
https://spetisburystationproject.wordpress.com/blog-3/page/2/


Wednesday 22 November 2017

Metcalfe weighbridge hut kit

Finished off the weighbridge hut. Modifications as described earlier for the walls. The slates looked a bit like concrete paving slabs, so I fished out some old Prototype Models slate paper and covered the roof with strips of this cutting each division with nail scissors, followed up with a wash of paint and some talc. The roof looks too wide in photos, but doesn't seem to notice in real life. I'd probably chop the roof width down by a scale foot if I did it again. Gutters from 60 thou square strip and pipes from 1mm rod, chimney pot from the tubes box.
Craig's piece in RM states it would take you an hour to put it together. With all the extra work involved this came to about four - most of it being the roofing. Question is does it improve the basic kit? Well it doesn't scream pink bricks Metcalfe anymore, just adding those few textures makes all the difference as does the copious amount of graphite. I still wouldn't lash out for a full price kit as it wouldn't have been any slower to scratch build it using card and brickpaper for pence. All quite enjoyable though and I suppose that's the point after all I've still got the last freebie in the drawer which is a low-relief shop. I have a mind to turn it into a narrow warehouse.

Tuesday 21 November 2017

Ratio GWR signal kit

Ratio GWR signal kit
Stuff coming at you thick and fast now with projects leapfrogging over each other. How does he do it? Drugs my friend. Sennapods and snuff: the snuff makes you sneeze and the sennapods dare you to...

Anyway. Signal done. GWR starter based on the shorty at Towyn at 64mm high. Platform, but no safety loop. Standard Ratio operating which is not quite prototypical, but the lever may get bypassed if it gets onto the AotC. The only additions are the PECO pins as pivots. Looking at it I'm wondering if it would look proportionally better with a 4' arm rather than the standard Ratio 5' one. Can't really be bothered to change it now though.

Metcalfe weighbridge hut kit

Metcalfe weighbridge hut kit
 Rapid posting this week caused by a few tidy up jobs.

Almost to get it off the bench I picked up the freebie card kit that came with RM this month. The usual one-off Metcalfe kit of a weighbridge hut. Not in the range as far as I know, but more a taster to get you to buy them. Regulars will know my thoughts on this range so no need to repeat. Young Craig (pause for effect) has run a blow-by-blow in RM which gets the basic kit built. However, regulars will also know that I won't (or can't) do that.

The first modification was to shade all the brickwork with an HB pencil to tone the 'orible pink bricks down a bit. The second mod was to try the old technique of scribing the glazing and rubbing paint in to get the window bars. I could have knocked up some plastic strip types, but it didn't seem worth the effort. This worked up to a point. I basically scribed away the white printing, rubbed a dollop of green paint in with my finger, counted to ten and then wiped it off with a tissue. It looks better with the interior painted black and isn't so stark and unlikely as the white. All the card frames were painted with a cheap green from The Works.
Thirdly, the lower door panels were chopped out and a piece of card stuck to the back and the whole lot painted. The PECO pin gives a door handle.

Saturday 18 November 2017

Gaugemaster controllers

Gaugemaster controllers
I'm always a bit sceptical when it comes to guarantees and this was no different. Gaugemaster now state that their controllers are covered by a 'lifetime guarantee'. Is this really correct, and does this mean my lifetime or the controller?
Anyway.

I bought the above from them when they had not long been trading and this was their first feedback machine - very cutting edge at the time, that being around 1987. This particular item was used as a main drive, then used in conjunction with a handheld for many years and is still kept in the exhibition box as a spare. The trouble was that time had not been good to the internal mains cable clamp and it had worked loose leaving the three coloured wires exposed - not PAT friendly when doing shows in council run venues.

Last Sunday I noodled into Gaugemaster (open Sunday...) with said controller and said the above and was it covered? Much sniggering ensued over the age of it; it being older than most of them, but yes it was. They took it away and waved me off. On Wednesday there was a phone message: all done.
I do take the piss out of them from time to time for being expensive and all corporate, but this is rather fine service if you ask me.

Saturday Ramble - Arun Quay

Saturday Ramble - Arun Quay
 A couple of snaps taken with my phone of Gordon Gravett's Arun Quay at the Uckfield show. This is rather inspirational for a least two reasons: firstly the utterly superb modelling which just does not get any better than this. Second, the fact that, like Ditchling Green, this is very much based on my patch. The Gravetts live in the west country, but oddly the modelling doesn't reflect this, and this being the second layout based in Sussex, the roots are surely hard to shake off.
Saturday Ramble - Arun Quay
This also digs straight into my thoughts of late regarding 'connection'. Try as I might I'm finding it very hard to get to grips with designing a possible American layout; it might yet happen, but I think this problem could be that I don't feel connected in any way to it as my only experience of it is though various media and not the real thing. So why is it that I'm usually known for narrow gauge modelling when they're a bit thin on the ground around here? Probably the repeated trips to North Wales and having a very good museum with a NG line. Arun Quay however hits the spot as I don't have to go very far to bump into similar architecture and in fact was in Arundel only yesterday on the river where this layout is supposedly set.
Going up against the Gravetts would be foolhardy in the extreme, but something similar in 4mm, may just have the connection that I need.

Friday 17 November 2017

Ratio signal kit operating

Ratio signal operating
Signals are a real fiddle and I can see why most modellers have a complete deliberate blind spot and ignore them. It is possible to jerry-rig a working system (even in 2mm, see Unnycoombe posts).

Down at the bottom a Peco pin has been used again - drop of superglue on the other side and trimmed off. Stops for either end of the up/down movement can be made at the other end of whatever operating system you're using, but I start with something to get me into the game with a piece of 20 thou rod glued to the post. A drop of paint renders it invisible from normal distances and it can always be cut off later, but if the arm is going 'stop......stop' where you want it to first off, rather than doing windmills, you're in a good starting point.

All this would be better in brass of course.

Thursday 16 November 2017

Ratio GWR signal chop

With the 48XX conversion stalled through lack of correct paint (you'd think GW green would be easy wouldn't you?) I moved as swiftly as a mixy rabbit toward signals. The inspiration is a middling height starter at Towyn. There's a cracking straight-on shot in one of C C Green's Cambrian books, so after a bit of scaling, the standard post in the Ratio pack was hacked down to 64mm and a new lower hole drilled. The rest as yet is pretty standard fare using a Peco pin rather than the wire for a pivot. The blind at the back was fixed with superglue and worked right the second time.
The choice of the Towyn (Tywyn?) example meant that it's got two lives, one in print and possibly a second as the starter on AotC.

Tuesday 14 November 2017

Fitting the Ratio signal box

I hadn't left quite enough space for the signal box with the original scenics. Clearance for stuff to sail past, but it looked too tight, so a chop back of a few mil and a new retaining wall from bits of scrap Wills kit. The Luftwaffe signalman is also now perched on the walkway ready to accept the token. Almost there now.

Monday 13 November 2017

Peco OO bullhead

 I popped into Gaugemaster today to get a pot of paint that they'd sold out off. Second on the list was to pick up a length of the new bullhead track (which they did have) to see what it was all about. Here's a few findings:
1. It's quite flimsy. The old code 100 was built to last and to be relaid if necessary. This is much more delicate, in fact the next one out of the box got broken by the staff. For lightness of appearance, you get fragile. 2. The sleepers are 33mm long, 9.5mm spacings and 3.25mm wide. So 10" x 8'3" which is a slightly weird compromise size.
 The top photo shows the direct comparison in height to a copperclad point using the same 75 bullhead (though to EM). The overall difference is about 1mm, so a similar point would need a bit of packing. the lower shot gives a direct comparison between the EM and the code 100 streamline. Easy to see the gauge difference here, but without the comparison and more side-on I'm not so sure you'd spot it straight away.
I'm quite impressed with it. Fragile and the slight up in price to code 100 aside, it's quite a visual jump. The new matching points at £32 rrp are another story. An average six point terminus comes out at £192 against around £72 in the old stuff, so whether it will bite amongst most modellers is doubtful. I suspect most will mix the track with the yellow pack 75 points.

Saturday 11 November 2017

4mm Southern Electric

About a year ago I was punting around for a simple structure to go with the electric section of my latest book. What I found was that Hornby and Bachmann had a lot of it covered, though there is some dispute whether some of it is actually to scale or not. While substations were out then, the more common, but slightly shyer TP huts didn't seem to have been done and were fairly simple. Finding anything out about them was a bit of a nightmare and photographing was worse - by their very nature the Track Paralleling hut is generally sited on open line and in simple terms, irons out the voltage between substations. With the drop in lineside clearance of the last few years most are surrounded by a sea of nettles. Good for the railway as it puts the scrotes off from nicking the cables, bad if you want photos for a book.
The basic walling is 60 thou plastic with the door and window from Wills. The vents are simply shaped from a lump of 80 thou. The roof is a piece of brick sheet from an indeterminable maker that was so brittle that most of it went in the bin. I just managed to get this bit done, covered with tissue and painted grey.
The cheat is that what you see, is all there is - the other two walls are undetailed.
The book - 'Modelling the Southern Region 1948-present' is available here and is ideal for a stunning Christmas present.

Thursday 9 November 2017

Hornby 14xx body

Another one of those old style conversions that doesn't seem to get done anymore. I note that there is less of this sort of thing going on and yet people are happy to pay £100 for a company to spray some muck on your loco and put coal in the bunker. Ho hum.
Anyway... Airfix/Hornby 14XX altered and backdated to be the first of the class i.e. 4800. So cabling scraped off, whistle shied removed, fireman's steps shaved and joy of joys hacking a filing the top feed away. This is an almost running Airfix example that I might swap onto a Hornby mech' as it'll run better and give more room in the cab. It only cost me a tenner, so not too scary to do. I might not be so happy with a brand new £70 exhttps://narrowplanet.myshopify.com/collections/custom-etched-productsample.
Plates have been ordered from Narrow Planet, which is a piece of cake - pick your scale, pick your number, type your card number in and they turn up. Perfect. Just make sure you get the number right... guess who didn't.

https://narrowplanet.myshopify.com/collections/custom-etched-products

Sunday 5 November 2017

Parkside Dundas van?

A small update on the 'praying' post of a couple of days back. The wagon in question was the above. The provenance of which is that I picked it up at a show unbuilt for £1.50. It looked complete but there was no header card and no instructions hence the price. What we have here is a BR van built around 1952 to diagram 1/208 which is a total minefield as that were built all over the place and changed to ply sides from planks halfway though. That much I knew or could look up.
The kit included an unfitted chassis though photos suggest that it should be a fitted version. The one good photo I found backs this up. While in Cornwall I built up the bits that were included and on return have added rain strips, tie bars vac cylinder/pipes and cross rod from Ratio bits and strip.
The question is this. I assumed that it was an early Parkside kit, but in the back of my mind I had it that they bought some Ian Kirk kit moulds and this used classic Parkside plastic, but it is a bit more rounded than their usual quality. Not that it really matters much - just curious. 

I'd part painted it beforehand using my usual German grey and dried turd mix for the roof and underside, and G**s Workshop morfang for the body, which is a fair match for newish stock brown. I just need to source some transfers and dirty it slightly.

Saturday 4 November 2017

Saturday Ramble

Haven't done one of these for a while.
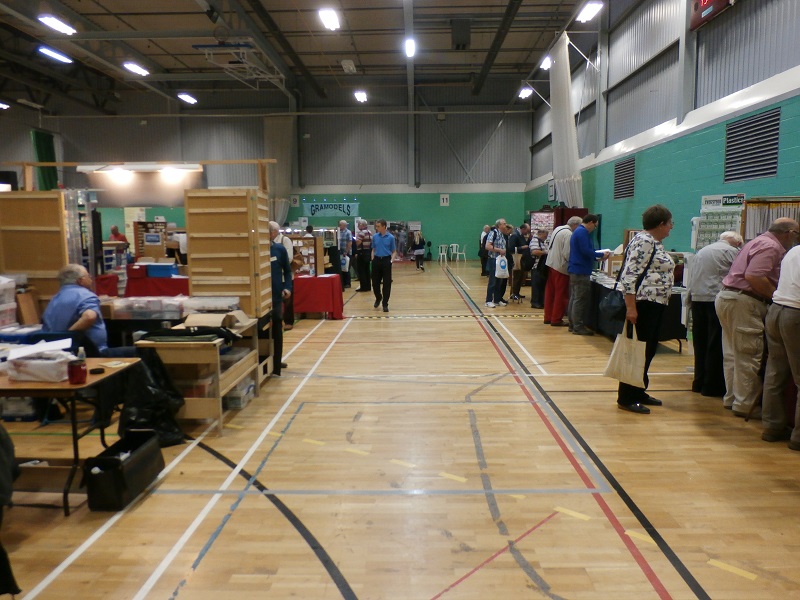
The Art of the Compromise is basically done, there are just a couple of detail bits to do. But then what next? This is a bit of a weird one: most of the layouts I build are loosely for exhibition - this isn't. Most are built with an end game target - this hasn't been. The only reason that it's been built at all was to see if the fourteen year old me was right and that it was buildable despite the first 1.5 attempts failing. Yes it can be done provided you tweek a couple of things and reduce some building sizes. The 'what now' is probably common to all modellers for once we've built something, what does it do? Despite appearances I'll bet that the percentage of modellers that actually take a layout to a show is relatively tiny, although if you peruse the mags it looks like that number is huge. The reality is that the exhibitors and mags are in a bubble and there is a vast swathe of the great unwashed modellers out there who build home layouts, the odd kit or two and the much derided box-opener/collectors.

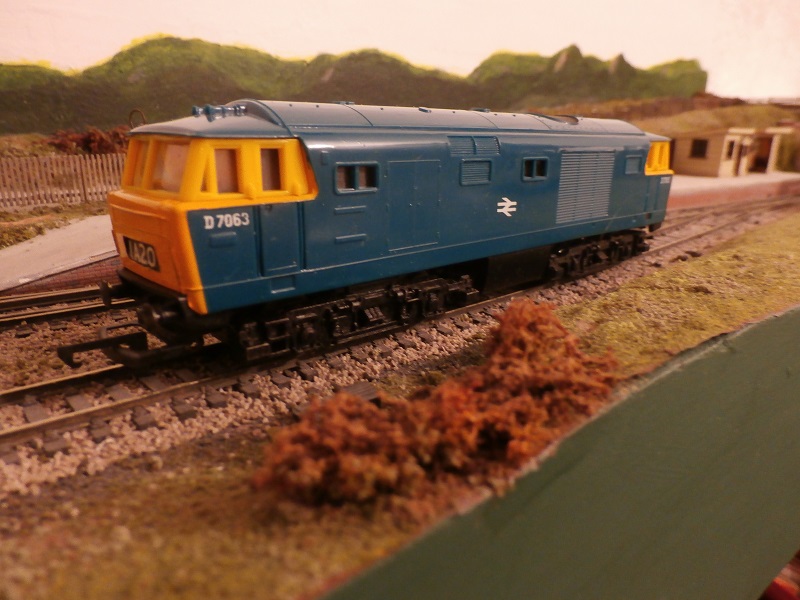
The AotC has one show in the spring - local and essentially for a mate. It's low pressure. I still have to build a couple more low trestles for this event. Low because it'll work better and because the overriding ethos for the AotC was to stick to things which were available in, and of a style of the late 70s and early 80s to match the 1978 plan. In other words before the 1995 turn of the Iain Rice driven high layout presentation which I've generally grown to hate - I've just spent a few days gricing a couple of lines in Cornwall and was frustrated by high walls and overgrown linesides with  reduced photo angles. I don't really want to play the same game at exhibitions. No I'm not a helicopter, but yes I do want to see your modelling.

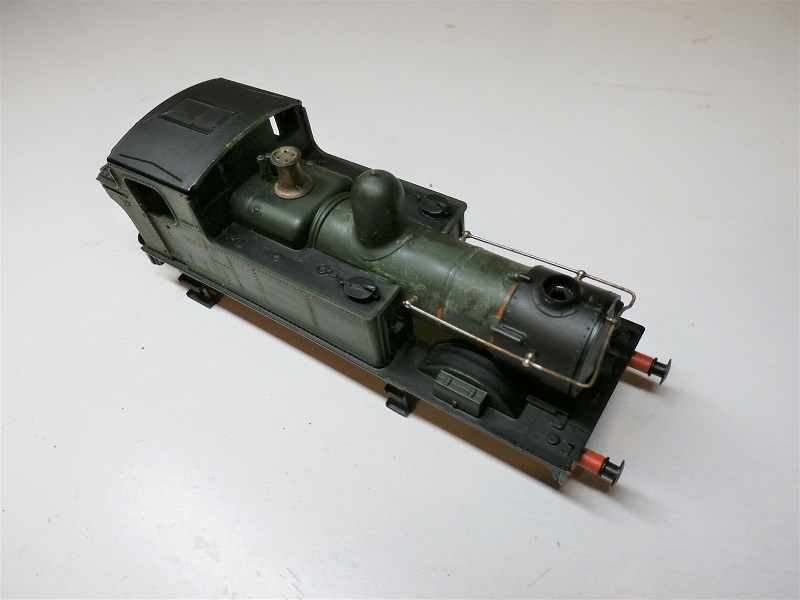
Do I then do the show in the spring and scrap the AotC for parts? Job done. Or do I do something that I've not done before and extend it? Logically the later, I'm very contrary about doing shows anyway, but there is the showman element in me that likes to occasionally wave my bits around in public view. I could spend a long while detailing stock and locos, but I fear my heart won't be in it. I'm in that rut where anything else seems pointless once the basic idea has been achieved. At the moment it sits along the wall as a glorified 16.5mm gauge test track.

Quite neatly, blogger informs me that this is my one thousandth post on here. Well who'd have thought it?

Friday 3 November 2017

Self leveling

A few days away - part business, part pleasure. I took a couple of kits with me to try and reduce the pile somewhat and a small tool kit. What I'm not used to doing is modelling with an audience. A bit of 'sighting up' on this BR van was found to be highly amusing by Mrs F. who of course is never without her phone...

Thursday 26 October 2017

Santa special

Bluebell again.
I took this from the bridge steps to get the lamp detail on the LBSCR 4 wheeler. What I wasn't seeing was the early arrival of the staff for the Santa Specials.

Monday 23 October 2017

Bluebell Railway

 As usual on a visit to the Bluebell I head for the smaller oddball stuff that everyone else avoids Yesterday I was in riding mode with two small people in tow and lucked out with the P Class and the pre-group four-wheeelers. It's a little cramped, but far preferable to something with a tender and a brace of Mk 1s. Howard (below) was having his carb emptied and closed for the winter and I had a brief chat to the guy working on it about the worry of declining engineering skills and the education of same. The BR run an apprentice scheme to try and fight this, but other lines seem to shy away, finding it easier just to moan about the lack of cash and young interest.

Saturday 21 October 2017

B set coach

As hinted in the previous post there are issues. I went on a search for info. If you look at the RMweb and Scalefour forum there is a) more info than you'll ever need, and b) much argument about what is wrong with the Airfix coach.
I took a deep breath.
The problems are: length, one window too many, wrong headstocks, inaccurate truss rods an identity crisis: is it an E 140 or a 147 or a 145?
More deep breaths and a couple of decisions.
It basically looks OK, but I decided to change a couple of things. Firstly make the headstocks flat and not curved, change the buffers (most were close coupled - some weren't). The truss rods were a step too far as was the window - like I said before, there comes a point where starting with a kit is  the easier option. The rest is paint: ends, roof and underside get a coat of grime, droplights get touched in, interior gets a set of block colours.
So still not perfect enough for the P4-ers, but a different enough from all the other  00 B set coaches out there.

Thursday 19 October 2017

Airfix B set coach

The Airfix B set. What a bloody minefield this is. Basically everything that is right with it is wrong, and everything that is wrong with it can be solved by throwing it away and getting a Comet kit.
I shall persevere.  Oh for the piss easy world of freelancing where nothing is wrong and everything can be explained away by Miles Bevan.

Saturday 14 October 2017

Vale of Reidol coach

A break away from the GWR for a bit - well almost. A little more cut and shut this week with a Parkside (now Dundas again) VoR brake and coach bash with a few other various bits of scrap and whitemetal castings thrown in. This will make up the back of the branch rake for Orne which will be coming your way soon.

Monday 9 October 2017

Ratio signal box - the crit'

Well it's done. Sort of. Not being able to run with anything as designed, there are obvious changes and a glaring problem that looks worse here than in real life.
The kit comes with stone steps - I thought his was a bit visually boring so diddled around with the 'extra' bits that come on the sprue. These are there as they are common with the kit for the larger box. With a bit of cutting and some 20 thou strip it's possible to knock up a narrow balcony, though this would benefit from a support or two.
The kit as bought goes together well if a bit fiddly. The fail is the guttering and down pipes. The gutter pieces are shorter than the roof by about 3mm. There must be a reason for this, but I can't quite work it out. Worse are the down pipes - beautifully made and designed to stand out from the building. The problem is that it's not enough. Any real pipe in this situation  would have a swan neck to bring the pipe into the building. When I summon up the bother I'll replace with some 1mm rod suitably curved and less jarring. The foot board is loose and would need adjusting in situ.

Wednesday 4 October 2017

Warehouse Wednesday Edgebaston store

Sorry Phil.
Entering offence #2 . Just down the bank from the carpark at the ERA show last weekend was a quite attractive canal basin that looked worth a further look. So once the rain had stopped, I noodled down there. NO ENTRY EXCEPT ON BUSINESS - was what the sign said. Well after my gate vaulting escapades of the previous day, I wasn't letting a sign stop me, so I ambled nonchalantly in, camera clearly visible and working out that I was wearing a shirt and a pinstripe jacket and not a hoodie and ripped jeans, so more 'I'm taking photos' rather than 'I'm nicking your cables'. The basin was full of barges and tugs; all very freight leaning and less pretty pleasure craft. This is the first building inside the gate. I'm thinking feed and tack store in it's original usage. The location is just east of the Edgebaston reservoir.

Monday 2 October 2017

Eardington Halt crime scene

On the way up to the ERA show a few stops were made to grice the SVR. Eardington wasn't on the list, but it was spotted as we drove past and a quick U-turn was made. The whole site was firmly padlocked up. So photography was tricky. Throwing caution to the wind and ignoring the 53 year old body, I worked out that I could bounce myself over the gate. So breaking, no. Entering yes. But all in the cause of photography as an art form.

Tel me this isn't the perfect minimum space station building.
More here:  https://www.svrwiki.com/Eardington


Sunday 1 October 2017

European Railway Association show

I had my doubts during set-up, but by the late afternoon de-rig it was fairly clear; the push for the hobby at the  moment is a) British diesels and b) continental. My slightly negative comments of late re: exhibitions were reversed - the ERA show was uncomfortably full at times and there was money being spent in large amounts from what I could see. This wouldn't normally be my sort of thing, but officially 'assisting' on Svanda meant I had time to compare and contrast. The general shows and the finescale are on a downward shift and the events like this are on the rise.

What was most evident was the chat and enthusiasm through out the day. I'd often thought that the continental modellers were a bit of a tribal bunch -it appears not. The team reported a better than expected day and we were well provided for. Halal chicken tikka sandwiches were a new item on the exhibitors lunch menu, but were eagerly snaffled up by self. 10/10

This was technically Svanda's last show; not that it is being retired, but simply that there is nothing else in the book. Time to consolidate.

Wednesday 27 September 2017

European Railways Association show

Svanda is at the ERA show in Birmingham this weekend. Drop by and say hello.


http://www.eurorail.org.uk/

Monday 25 September 2017

Ratio signal box roof

If not at the finish line, I'm definitely in sight of it. The roof section now done complete with a bit of paper flashing around the chimney. The footsteps next.

Sunday 24 September 2017

Scaleforum

Off to Scaleforum today, mainly for a bit of shopping and a general nose around. Not my usual haunt or social circle, but there's usually some good trade.
First off, the food (compared to Woking) was top notch, good basic fare and plenty of it, so that's a relief. Just shows that it's not that hard to get it right even in a leisure centre environment.

The show... hmmmm. 10 layouts (Though you had to search a bit) obviously of the P4 variety - that much is expected. The rest however... quiet. Sparse. The first time I went to the new venue, after the Society left its usual Leatherhead home, you couldn't move, couldn't park, and couldn't get near any layouts. Today? Well the picture says it all. I wonder if they are suffering with the UKIP effect of now having shouted for higher standards and got them, they are in a wilderness period.


Saturday 23 September 2017

Seaford signal box


Quite a while ago now I realised I'd got locked out of my flickr account. I tried all the usual dodge arounds to no avail. So I just left it there. Then a series of research escapades found me lurking on other people's flickr pages and finding it all quite useful. The upshot of which is that a new page has been opened up. Most of the initial uploads are things that were closest to hand, but I'm in a steady process of loading all my Seaford branch shots from the 70s forward. Seems a shame to leave them hanging around in a cupboard when they may be of use.

Seaford signal box


https://www.flickr.com/photos/154892326@N06/with/37023733592/

Friday 22 September 2017

Art of the Compromise on the road

Now that the AotC is semi-booked for  the WRG show in the spring a little work was needed to get it to a point where it could be shown. The basic premise is that it is front operated at home, so there was no provision for rear operation. An earlier trial on the usual trestles proved that they were too high to reach over, and the alternative would be to stand right in front of it- not ideal. As this will probably be its only show I didn't want to do too much, but a set of shorter trestles have been knocked up out of lolly sticks set at a traditional, and to my mind a better height. Wednesday saw the trial to see if that would work. Now I just need to get the stock sorted.

Tuesday 19 September 2017

Hymek

Note for younger readers, at least anyone under 30. This is an engine. Not your weedy, DCC, sound, detailed Bachmann crap, but an ENGINE. I got some of the old Rhiw stock out and this was second in the pile. Still in its box with Triang-Hornby branding. I make that the thick end of 50 years old. Plopped it on the track BRRRRRRRRR......... Flick switch, BRRRRRR....... Who needs sound chips -next door were hammering on the wall thinking I was drilling.
It doesn't say 'made in china' on the bottom, but 'Built (built!!!) in Britain'. This was something that you could thrash round for hours even after your Dad had stepped on it.

There were a couple of spare locos for Rhiw, this being one. But when it came out the grins appeared. It's basically dimensionally correct, but lacking any obvious finesse, and is everything MRJ railed against - however, have we taken a wrong turn? Cos this has presence like no Heljan Hymek ever could.

Friday 15 September 2017

Lever frame

And more or less done. Here with the upper structure dropped on.  Once you start scratching the surface, you open up the worm can. I started asking how many of each colour? AotC has four points so that's the black ones done, and I reckoned two FPLs and at least four signals. That filled the frame with no spares. I re-read Tim Rayner's excellent article in RM from a couple of years back and now I get the feeling that I probably needed about 15 levers as opposed to 10. Too late now, I shall never sleep again. Maybe some clever person could draw up a signalling diagram for the layout.

Because AotC is a 'model' and not really drawn from real practice, it probably needs ground signals on both sidings, which in essence means three FPLs as they exit the running line . There would be a Home beyond the bridge, plus the starter and another ground at the far end. Would the crossover be worked on one lever? Questions... but then it's barely visible anyway.

Ratio signal box interior

Another stall point, so another sideways jump. The signal box has been hanging around on the bench for weeks, so I fired myself up to do the interior. This is one of those 'why are you bothering' moments. By the time the roof is on and it's all dark and gloomy, and there's a bit of reflection off the glazing, you won't be able to see anything in there. Plus its final position on the AoC will be at the front facing away from the viewer. However... with nothing in there it just looks wrong.
Regulars will know that I'm not one to splash the cash if I don't need to, no 12 quid interior kit for me, so a bit of subterfuge comes into play. What is needed is shapes, not hyper-detail. A table was knocked up out of a bit of 20 thou and some strip and the instrument bridge from lengths of square sprue  and the pips from the same. A sloppy coat of dark browns and all is done. Rough? Absolutely. But behind the glass there is just enough visual information to suggest more. A bench seat has also been done from the original doors on the pagoda. Levers next.

Lever frame done. Piece of 80 thou rounded off, a few holes and some strip. Most of the visual info will be colour - black blue and red with  touch of metallic on the tops. I did include the kick plate even though it'll be invisible. Below the basic inspiration